Turn ON/OFF Dark Mode in macOS 13 Ventura on Mac
There are two quick ways to activate the dark mode on Mac. Though slightly hidden under the Display slider, the easiest way to turn on this mode is from the Control Center. Besides, you can always enable it through the System Settings app.
Enable/Disable Dark Mode via Control Center on Mac
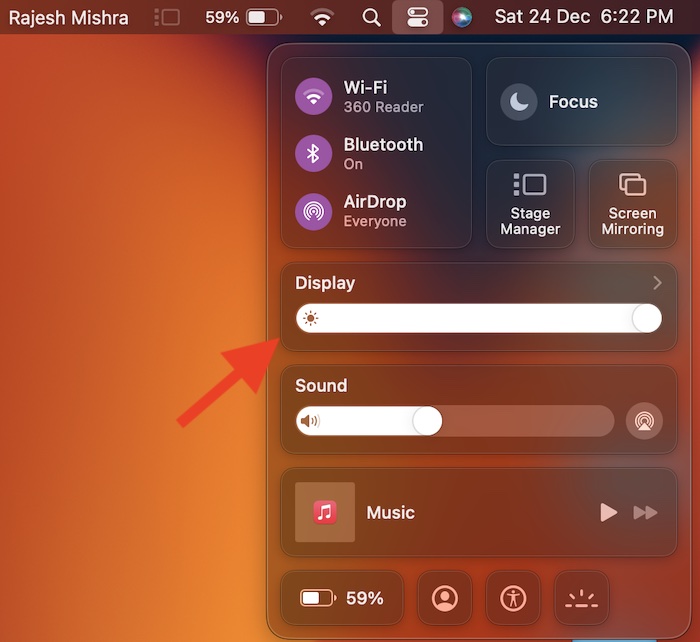
- First off, click on the Control Center icon at the upper right corner of the screen.
- Now, click on the Display slider.
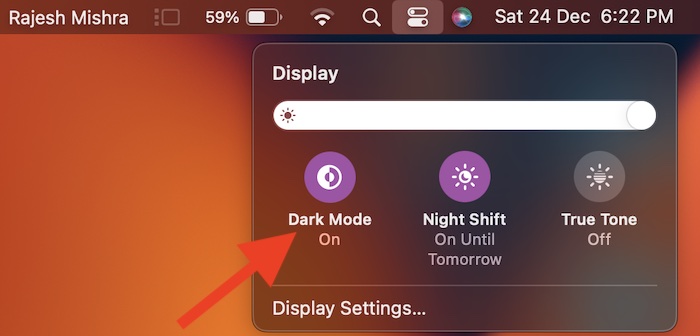
- Then, select Dark Mode to turn it on.
The change will come into effect right away and reflect everywhere. Now, go ahead and use your Mac as long as you want to, knowing that the screen brightness won’t hurt your eyes. At any time, you wish to disable the dark mode, click on the control center icon -> display slider and then hit the Dark Mode icon to turn it off.
Enable/Disable Dark Mode via System Settings on Mac
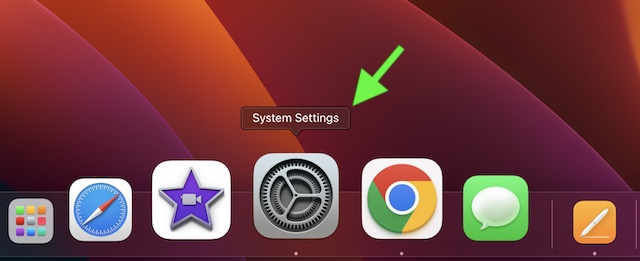
- To get started, open the System Settings app on your Mac. Or, click on the Apple menu at the upper left corner of the screen and choose System Settings.
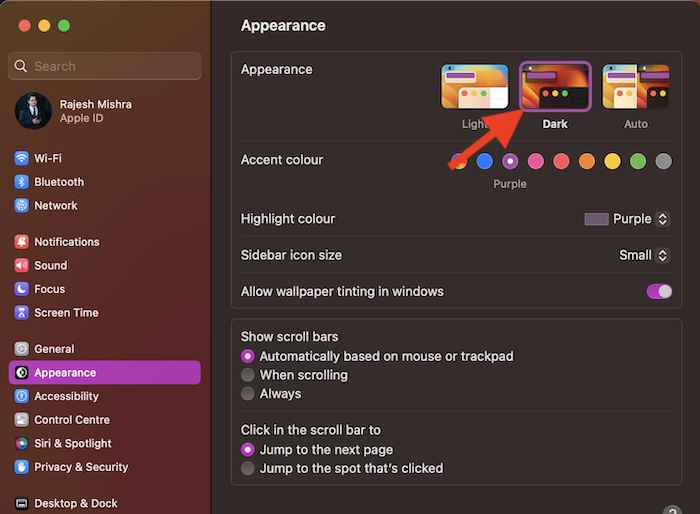
- Next, choose Appearance.
- Next up, select the Dark Mode tile at the top of the screen.
- Notably, macOS Ventura also lets you choose an accent color and highlight a specific color. If you would like to amp up the customization game, make sure to tweak the accent color and highlight the desired color as per your taste.
Wrap up…
And that’s pretty much it! So, that concludes this quick guide about using the dark mode on Mac. Thanks to the overhauled design, the settings for several notable features including fast user switching, Hot Corners, Type to Siri, changing the default browser, Night Shift, and more have changed – triggering a helluva of confusion. Make sure to check these handy guides, if you also wonder where they have gone. Read more: 6 Tips to Fix Apple Studio Display Brightness Not Working


