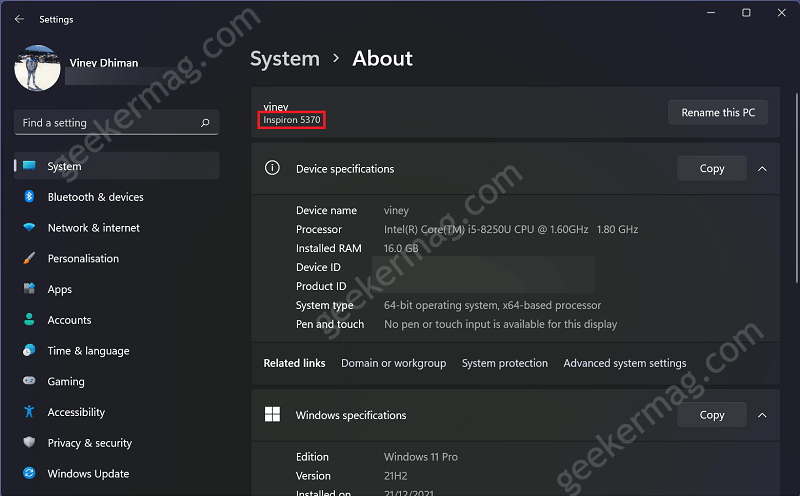
In order to check the System Product Name of your Windows 11 PC, you can head over to Settings > System. Here on the right side, you will find it on the top page listed under PC username. You can check screenshot below to get clear idea: What shocking about System Product Name is that it can’t be changed even if you’re administrator of the device. Although there’s no problem with that and it won’t affect functionality of the device. In case, you’ve build a custom PC, generally there’s no System Product Name assigned to your Windows 11 PC. In this situation, it will be a great idea to change System Product Name in Windows 11 to preferred OEM or Name
How to Change System Product Name in Windows 11
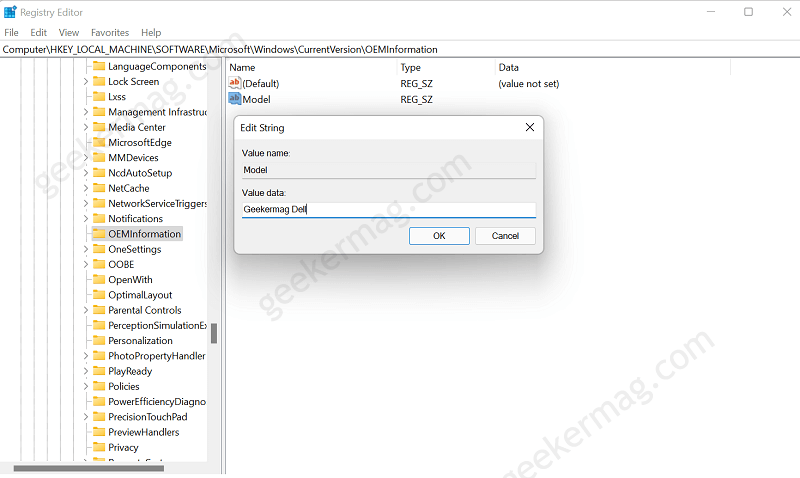
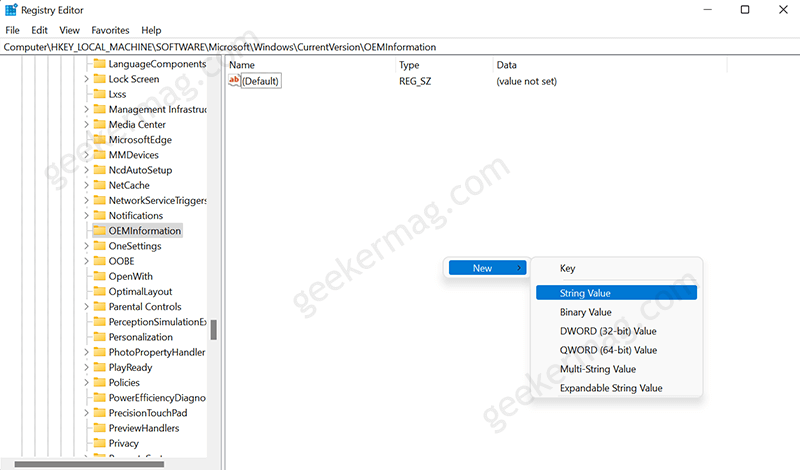
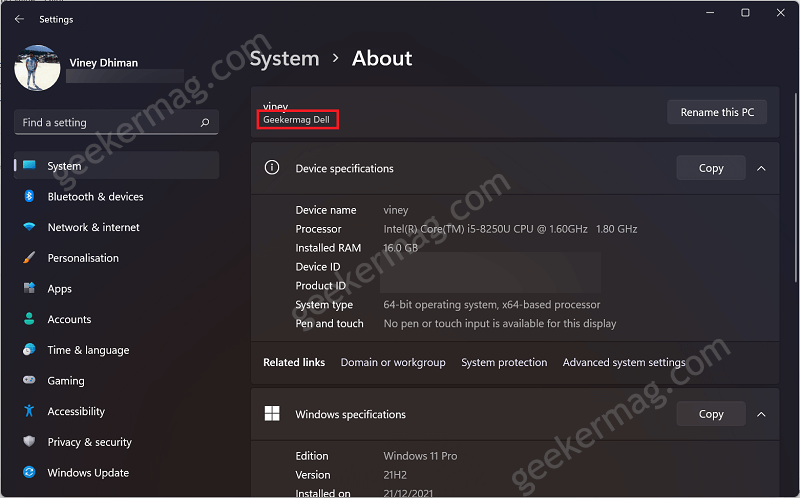
Officially, there’s no option available in the Windows 11 to make this change, but possible using a registry hack. Here’s how you can do that: Launch Registry Editor in Windows 11 PC. For that, WIN + R to launch Run dialog box, then type regedit, click OK. You need to head over to following key address: Computer\HKEY_LOCAL_MACHINE\SOFTWARE\Microsoft\Windows\CurrentVersion\OEMInformation On the right side, you will find string value named as Model. Double-click on it in and set its Value data to System Product Name. It could OEM or preferred Name. In case, Model string value is missing under OEMInformation key, then you need to create it manually. For that, right-click on the empty space, select New > String value and name it Model. Now follow the above step to edit it. Click OK to apply the changes and close Registry editor. Now, you need to head over to Settings > System. Here, you will find updated System Product Name. In case, its not updated, then restart your computer to apply the changes. This is how it looks like: Following same procedure, you can set name of your choice. Why don’t you try this solution to change System Product Name in Windows 11. Also, let us know in the comment, what name you set.


